MS-OFFICE
Getting to know Word 2013
Word 2013 is similar to Word 2010. If you've previously used Word 2010, then Word 2013 should feel familiar. But if you are new to Word or have more experience with older versions, you should first take some time to become familiar with the Word 2013 interface.
The Word interface
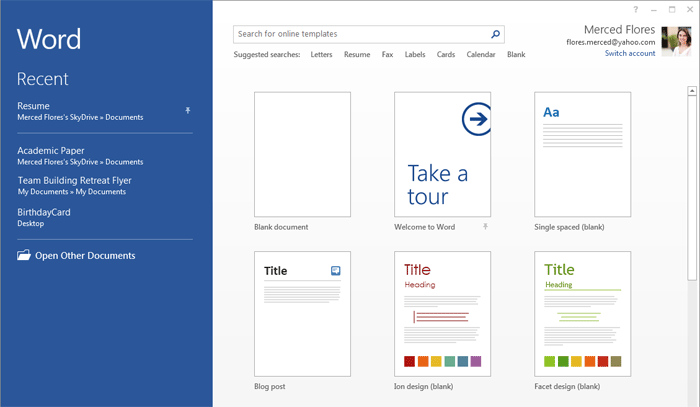
When you open Word 2013 for the first time, the Word Start Screen will appear. From here, you'll be able to create a new document, choose a template, or access your recently edited documents.
- From the Word Start Screen, locate and select Blank document to access the Word interface.
Click the buttons in the interactive below to become familiar with the Word 2013 interface.
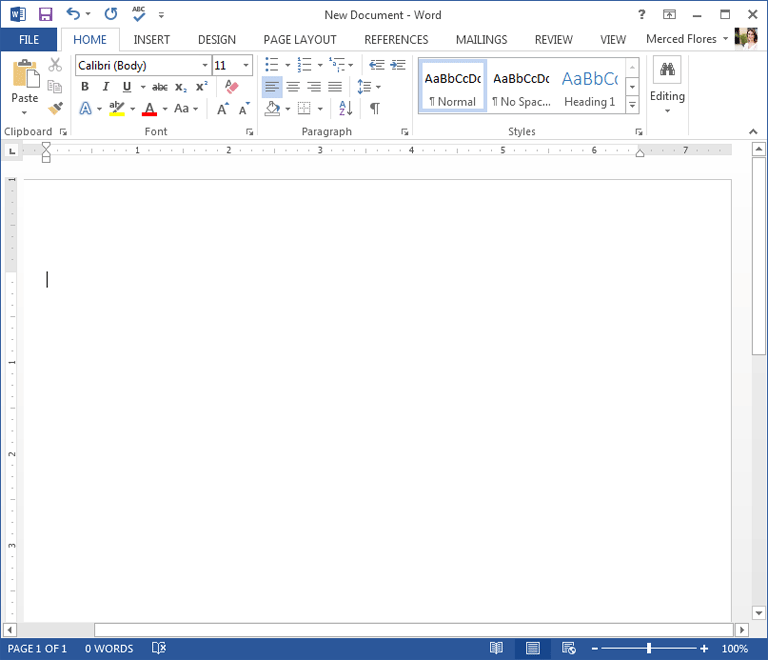
Working with the Word environment
If you've previously used Word 2010 or 2007, then Word 2013 should feel familiar. It continues to use features like the Ribbon and the Quick Access toolbar—where you will find commands to perform common tasks in Word—as well as Backstage view.
The Ribbon
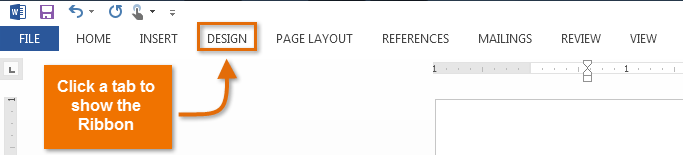
Word 2013 uses a tabbed Ribbon system instead of traditional menus. The Ribboncontains multiple tabs, each with several groups of commands. You will use these tabs to perform the most common tasks in Word.
Click the arrows in the slideshow below to learn more about the different commands available within each tab on the Ribbon.


Certain programs, such as Adobe Acrobat Reader, may install additional tabs to the Ribbon. These tabs are called add-ins.
To minimize and maximize the Ribbon:
The Ribbon is designed to respond to your current task, but you can choose to minimizethe Ribbon if you find that it takes up too much screen space.
- Click the Ribbon Display Options arrow in the upper-right corner of the Ribbon.
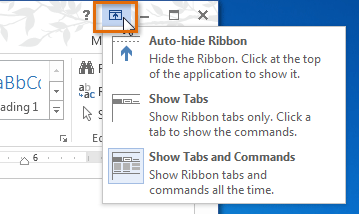
- Select the desired minimizing option from the drop-down menu:
- Auto-hide Ribbon: Auto-hide displays your document in full-screen mode and completely hides the Ribbon from view. To show the Ribbon, click the Expand Ribbon command at the top of screen.
- Show tabs: This option hides all command groups when not in use, but tabs will remain visible. To show the Ribbon, simply click a tab.
- Show tabs and commands: This option maximizes the Ribbon. All of the tabs and commands will be visible. This option is selected by default when you open Word for the first time.
- Auto-hide Ribbon: Auto-hide displays your document in full-screen mode and completely hides the Ribbon from view. To show the Ribbon, click the Expand Ribbon command at the top of screen.
To learn how to add custom tabs and commands to the Ribbon, review our Extra on Customizing the Ribbon.
To learn how to use the Ribbon with touch-screen devices, review our Extra on Enabling Touch Mode.
The Quick Access toolbar
Located just above the Ribbon, the Quick Access toolbar lets you access common commands no matter which tab is selected. By default, it shows the Save, Undo, and Repeat commands. You can add other commands depending on your preference.
To add commands to the Quick Access toolbar:
- Click the drop-down arrow to the right of the Quick Access toolbar.
- Select the command you want to add from the drop-down menu. To choose from more commands, select More Commands.
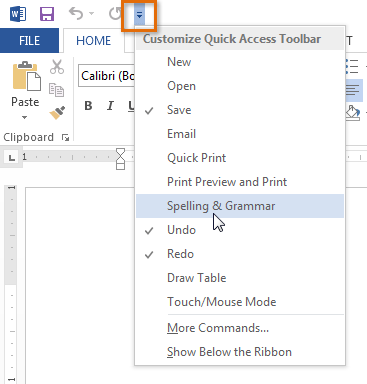
- The command will be added to the Quick Access toolbar.
The Ruler
The Ruler is located at the top and to the left of your document. It makes it easier to adjust your document with precision. If you want, you can hide the Ruler to create more screen space.
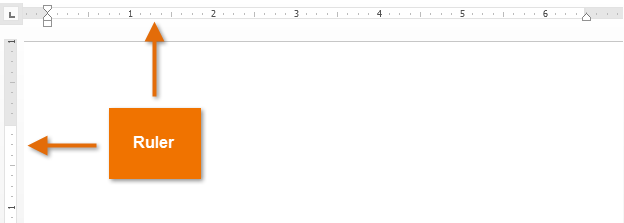
To show or hide the Ruler:
- Click the View tab.
- Click the check box next to Ruler to show
 or hide
 the ruler.
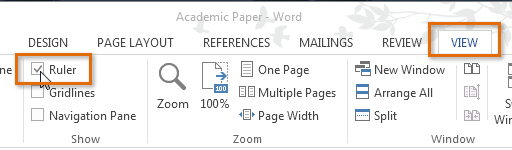
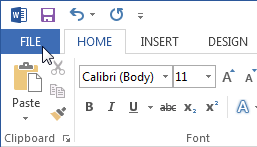
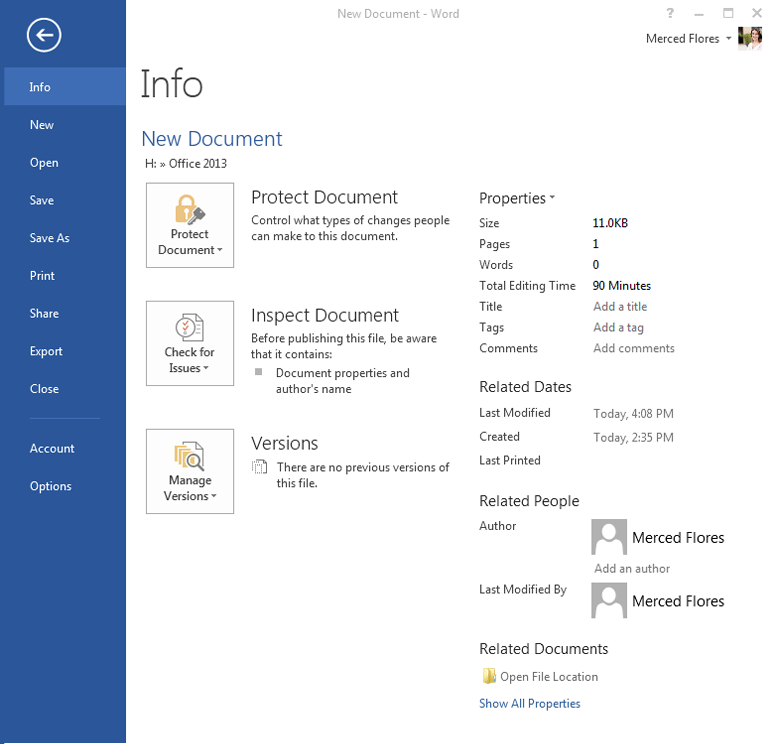
Backstage view
Backstage view gives you various options for saving, opening a file, printing, and sharing your document.
To access Backstage view:
- Click the File tab on the Ribbon. Backstage view will appear.
Click the buttons in the interactive below to learn more about using Backstage view.
Document views
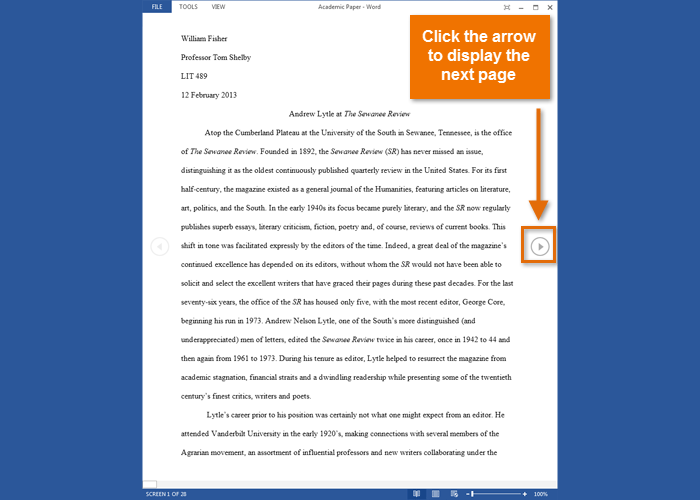
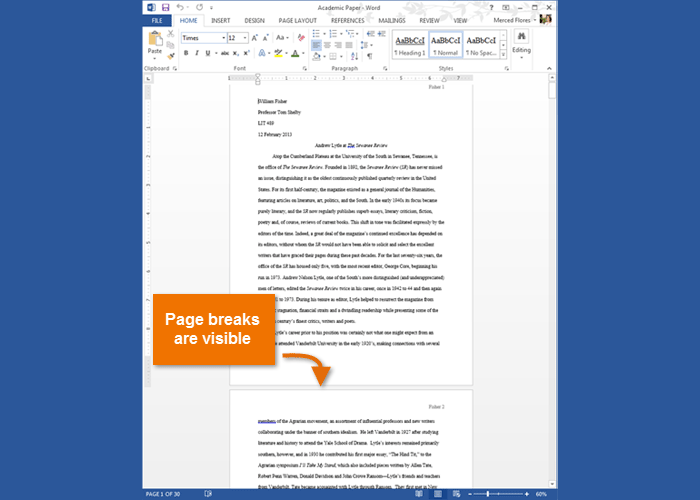
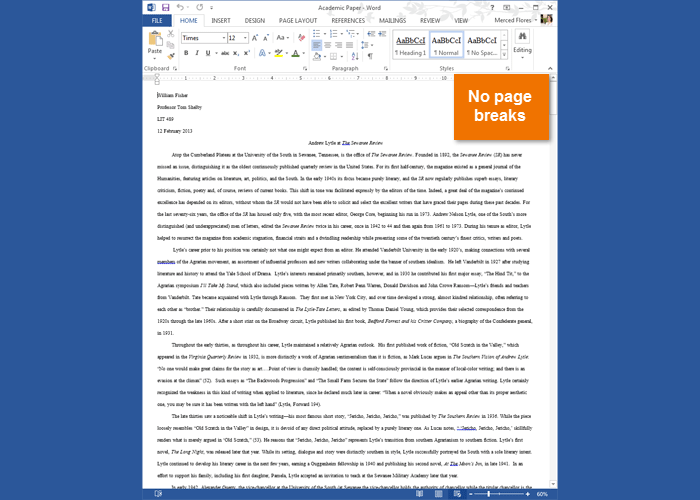
Word 2013 has a variety of viewing options that change how your document is displayed. You can choose to view your document in Read Mode, Print Layout, or Web Layout. These views can be useful for various tasks, especially if you're planning to print the document.
- To change document views, locate and select the desired document view command in the bottom-right corner of the Word window.
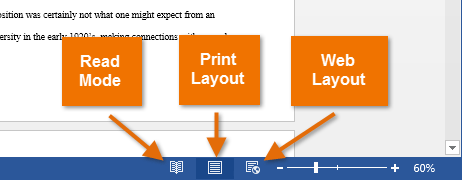
Click the arrows in the slideshow below to review the different document view options.
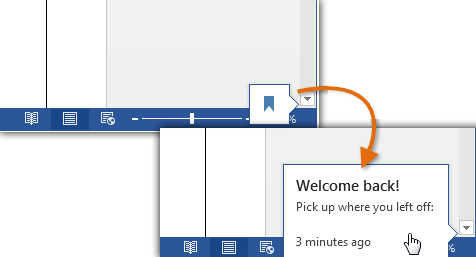
If your document has many pages, Word 2013 has a handy new feature called Resume Reading that allows you to open your document to the last page you were viewing. When opening a saved document, look for the bookmark icon to appear on the screen. Hover the mouse over the bookmark, and Word will ask if you want to pick up where you left off.

Comments
Post a Comment